A patient sat down in my Pittsburgh chair last fall holding her phone. She turned the screen toward me and showed me a close-up photograph of her own smile. She had taken it that morning in her bathroom mirror. “Can you see this?” she asked, pointing at her right central incisor. “It looks like plastic. Why does my tooth look plastic?”
She had a Class IV composite restoration on that tooth, placed by a different dentist about two years earlier. The shade match was acceptable. The margin was clean. There was no recurrent decay. By every standard clinical measure, the restoration was a success.
It also looked, unmistakably, like a piece of polished resin sitting next to a real tooth. Her diagnosis was correct.
Five repeatable techniques that make everyday restorations look advanced.
The most common composite complaint isn’t shade
When general dentists describe their composite frustrations to me, shade matching is what they mention first. It’s the variable they were trained to think about, the one most CE courses focus on, and the one composite manufacturers compete on. “My shade matches are off.” “The restoration looks gray.” “The value isn’t right.”
But when patients describe their composite frustrations, they almost never use the word shade. They say things like “it looks fake,” “it looks dull,” “it doesn’t look like the rest of my tooth,” and “it looks like plastic.” Different vocabulary, different problem.
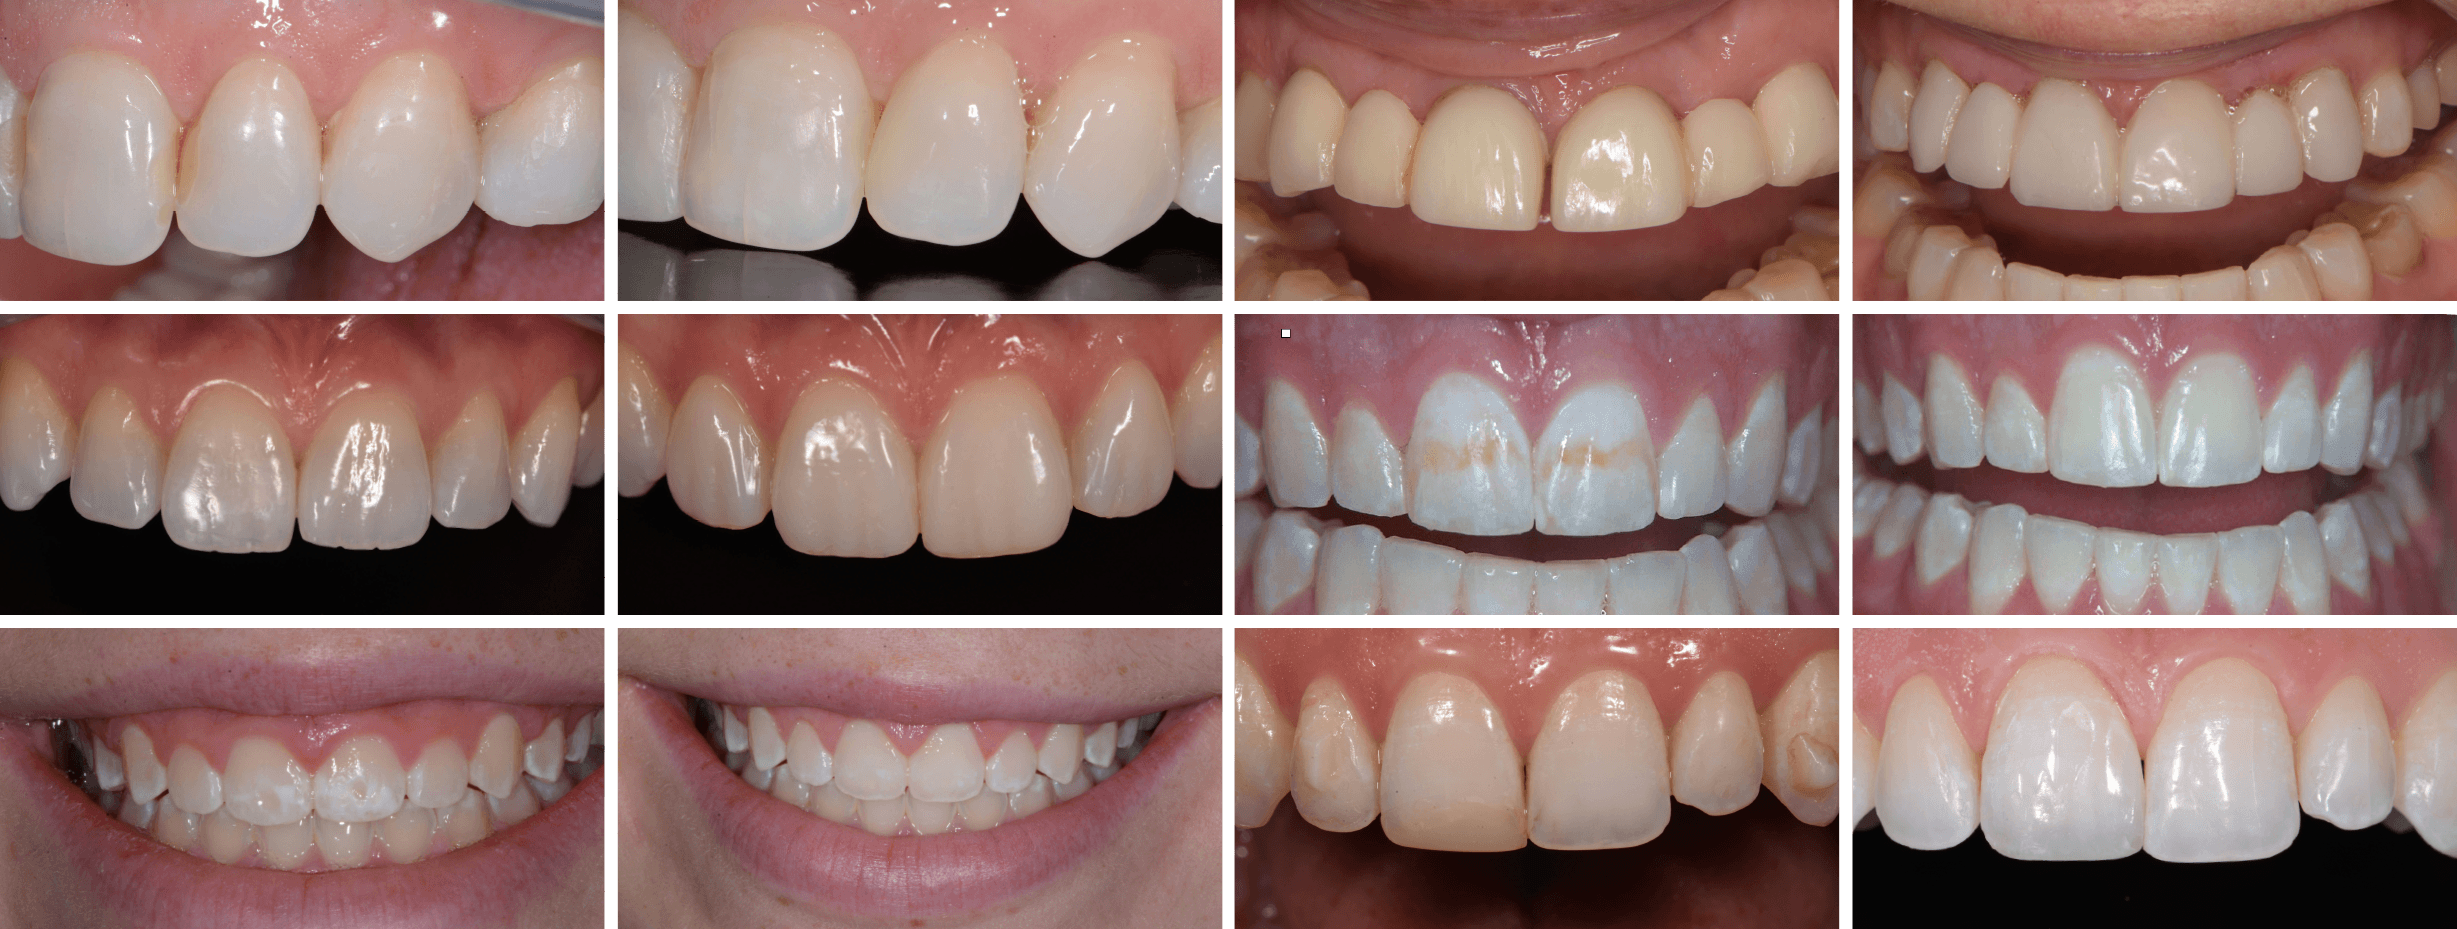
What patients are seeing isn’t a shade mismatch. It’s a surface mismatch. The composite has been polished to a uniform high-gloss finish that natural enamel doesn’t have. This high gloss usually fades to dull and flat. The surrounding teeth have texture — lobes, fossae, perikymata, horizontal surface lines — and the restoration doesn’t. Even when the color is correct, the eye reads the difference and the patient calls it “plastic.”
This is a fixable problem. It is also, in my experience, the single fastest improvement a general dentist can make to their composite outcomes.
What we were taught to do, and why it’s wrong
Every dental school teaches polishing the same way: take the composite to a high shine. Rubber points, discs, cups and diamond impregnated brushes; the protocol is mostly about progressive grit, with the goal of producing a glassy-smooth, mirror-finish surface. The published guidance from major manufacturers consistently emphasizes high gloss as the endpoint.
The problem is that high gloss is wrong. Natural enamel doesn’t shine like a marble. It scatters light through micro-anatomy; rounded lobes that interrupt the facial plane, shallow fossae that catch light at angles, and horizontal lines that run perpendicular to the long axis of the tooth. That texture is what produces the soft, dimensional appearance we read as a real tooth.
When you polish a composite to a uniform high gloss, you remove all of that. The restoration’s surface becomes a flat plane that bounces light back as a single bright reflection. Surrounded by textured natural teeth, the result is a restoration that reads as artificial, even when every other variable in the case has been done correctly.
The composite isn’t the problem. The polish is.
The five-minute fix
The technique that solves this is what I call The Five-Minute Finish. It’s a polishing protocol I developed specifically to put surface anatomy back into composite restorations, and it’s the module from my course that I see transform a dentist’s outcomes the fastest.
The protocol uses standard polishing instruments. There is no specialty tool, no proprietary system, no expensive new inventory. Most general practices already have everything required. What changes is the sequence and the goal.
Three elements distinguish the protocol from conventional polishing.
First, the goal is texture, not gloss. Instead of progressively eliminating surface irregularities to achieve a mirror finish, the protocol deliberately establishes specific anatomical features — lobes, fossae, and horizontal surface lines — that match the surrounding teeth. The composite ends up with a surface that scatters light the way enamel does, not the way plastic does.
Second, the technique reads adjacent natural anatomy as a guide. Before the polish begins, you look at the teeth on either side of the restoration and identify the specific anatomical features the patient’s natural enamel has. Some patients have prominent lobes; some don’t. Some have visible perikymata; some have a smoother surface. The polish protocol matches whatever pattern is already there — the restoration is calibrated to the patient, not to a generic ideal.
Third, the entire protocol takes about five minutes. This is critical. Most general dentists won’t add fifteen minutes of polishing time to a procedure regardless of how good the outcome is. Five minutes fits inside the appointment they’re already scheduling. The technique is sustainable in a real-world general practice schedule.
What changes when the polish changes
Dentists who adopt this protocol consistently tell me their composite outcomes seem to improve overnight. They didn’t. The composites they’re placing are exactly as good as the ones they were placing before. What changed is that they stopped polishing the anatomy away.
The visual difference, side by side, is dramatic. A composite finished with conventional high-gloss polishing reads as a separate object sitting on the tooth. The same composite finished with surface anatomy preserved reads as part of the tooth. Patients notice. They stop using the word plastic. They start sending referrals.
There is a secondary benefit that isn’t cosmetic. Composite restorations finished with surface anatomy retained have been shown in long-term observation to hold up better against staining and biofilm accumulation than over-polished surfaces. The texture isn’t just esthetic, it’s also functional. Restorations that look better also tend to last longer.
Where to learn the technique
The Five-Minute Finish is taught in Module 03 of the Zero Trace Restorations online CE course series with Dental Education Studios. The module is sixty minutes, covers the complete polishing sequence with specific instrument guidance, and includes side-by-side case examples showing the same composite finished both ways.
The course is built for general dentists. The protocol works with any modern composite system and uses polishing instruments most practices already have. It fits inside the appointment time you’re currently working in.
One last thought
Patients who say their composite restorations look like plastic are usually right. The diagnosis just isn’t the diagnosis we expect. They aren’t seeing a shade mismatch or a marginal failure. They’re seeing a surface that doesn’t scatter light the way the teeth around it do.
The fix is five minutes of differently-sequenced polishing. It is, in my experience, the smallest change a general dentist can make for the largest visible improvement in their composite outcomes, and the fastest way to stop being told by patients that their restorations look fake.